When it comes to residential construction, roof framing is one of the most complex and detail-oriented stages of the build. Among the many methods used, cutting overframed roofs stands out as one of the most challenging tasks for framers, demanding precision, experience, and a solid understanding of geometry and structural loads.
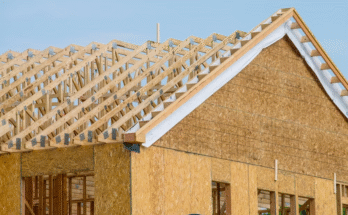
An overframed roof—sometimes called a California roof—is built on top of an existing main roof structure, typically to add a dormer, extend a gable, or integrate multiple rooflines into one seamless design. Unlike traditional framing, where rafters rest directly on top plates and ridge beams, overframing requires laying additional rafters above an existing roof plane, tying new roof sections into the original structure without compromising its strength or waterproofing.
In this article, we’ll explore why cutting overframed roofs is so complex, the calculations required, the tools and techniques professionals rely on, and the common mistakes to avoid.
1. Understanding Overframed Roofs
Before you can cut an overframed roof, you need to understand what makes it different from standard roof framing. In a typical gable roof, rafters run from the top plate of the wall to a central ridge beam, forming a straightforward triangle. Overframing, however, involves stacking a secondary roof structure on top of an existing one.
This method is often used when:
- Adding a dormer to an existing home
- Extending the roofline for a porch, garage, or addition
- Blending multiple roof slopes together for architectural appeal
- Creating intersecting gable or hip roof designs
While overframing gives architects and homeowners more design flexibility, it makes life much harder for framers. Everything must line up perfectly: the new pitch must match seamlessly, valleys must drain properly, and the existing roof’s load-bearing capacity must remain intact.
2. Why Cutting Overframed Roofs Is So Challenging
Unlike standard rafter framing, overframing introduces a new layer of complexity. The difficulty comes from three main factors:
a) Multiple Roof Pitches
In many cases, the overframed section has a different pitch than the existing roof. This requires careful calculations to ensure rafters, valleys, and ridges intersect cleanly. Even a slight miscalculation can lead to gaps, uneven planes, and water infiltration problems.
b) Structural Integration
The new roof must tie into the existing framing without compromising structural integrity. Sleeper boards, valley rafters, and ridge supports all need to be positioned precisely to distribute weight correctly.
c) Waterproofing and Drainage
If the overframed sections aren’t cut and aligned properly, valleys and transitions can trap water, leading to leaks, rot, and mold. Framers must plan flashing, underlayment, and drainage strategies from the start.
3. Planning Before Cutting
The key to a successful overframed roof is planning every cut before touching the saw. Inexperienced framers often rush into cutting rafters, only to discover later that their math was off or their angles don’t match.
Here’s what professional framers always do first:
Step 1: Measure the Existing Roof
Using a digital level or framing square, determine the pitch of the main roof. This establishes the baseline for your calculations.
Step 2: Establish the New Roof Pitch
Decide on the slope of the overframed section. Sometimes, it matches the existing roof for seamless integration, but in other designs, a steeper or shallower pitch is used.
Step 3: Determine Ridge Height
Use the rise-over-run formula:
Rise = Run × Pitch
This calculation gives you the exact height of the new ridge relative to the existing plane.
Step 4: Mark Sleeper Locations
Sleeper boards, fastened over the existing roof, provide a flat bearing surface for new rafters. Accurate layout here is essential for keeping the new roof straight and level.
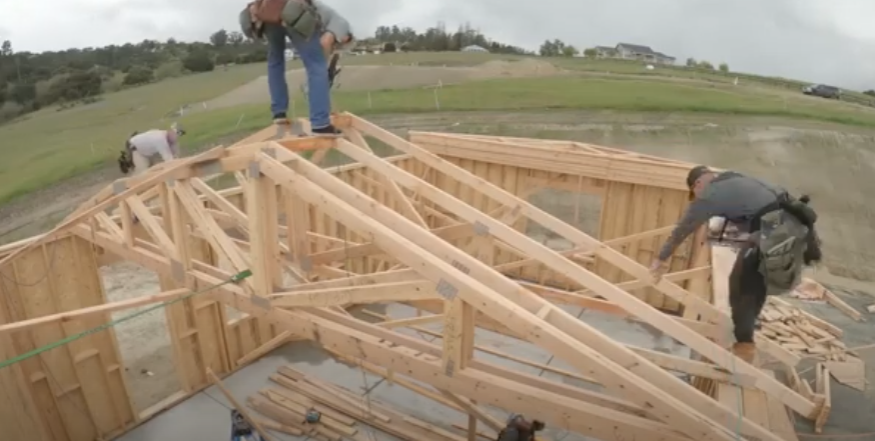
4. Cutting Overframed Rafters
Rafter cutting for overframed roofs demands precise angles and compound cuts. Every rafter has three main components:
- Plumb Cut: The angled top cut where the rafter meets the ridge.
- Seat Cut (Birdsmouth): The notch that rests on the sleeper or top plate.
- Tail Cut: The extension forming the roof overhang or eave.
Step 1: Plumb Cuts
Use a framing square or digital bevel gauge to match the pitch of the new roof exactly. Even a 1° deviation will cause gaps at the ridge, leading to alignment problems.
Step 2: Birdsmouth Cuts
Unlike standard framing, the birdsmouth must account for sleeper thickness and existing sheathing layers. If you don’t calculate these dimensions correctly, rafters will sit unevenly.
Step 3: Rafter Tails
Consistent overhangs are critical for fascia and soffit alignment. A stop-block jig is often used to ensure every rafter tail matches perfectly.
5. Tying Overframed Roofs Into the Existing Structure
The biggest challenge in overframing is making the new roof look like it was part of the original build. That requires precise integration at critical points:
a) Valleys
Where two roof planes meet, a valley rafter carries significant loads and channels water. Valley boards must be cut at compound angles for a tight fit and proper drainage.
b) Ridge Alignment
The new ridge must tie seamlessly into the main roofline, maintaining symmetry and preventing dips or humps.
c) Sleeper Board Leveling
Because rafters rest on top of the old roof, sleepers must be perfectly level. Any deviation here translates into waves or sags across the new roof plane.
6. Common Mistakes to Avoid
Cutting overframed roofs can go wrong quickly if you don’t follow precise procedures. Some common errors include: