When it comes to modern flooring systems, Advantech floor sheathing has become one of the top choices for contractors, builders, and homeowners alike. Known for its exceptional durability, moisture resistance, and strength, Advantech panels are specifically engineered to create a sturdy, squeak-free subfloor. However, to take full advantage of the product’s performance, you must install it correctly. Two of the most critical installation factors are nail patterns and sheet staggering.
In this comprehensive guide, we’ll break down everything you need to know about Advantech floor sheathing nail patterns and staggering sheets to ensure a long-lasting, structurally sound, and quiet floor system.
1. Understanding Advantech Floor Sheathing
Advantech panels are high-performance engineered wood products developed by Huber Engineered Woods. Unlike traditional plywood or OSB, Advantech is designed using advanced resin technology that makes it:
- Stronger than standard OSB or plywood
- Highly resistant to moisture and swelling
- Smoother, which simplifies flooring installation
- Certified for structural subfloor use
Because of these qualities, Advantech panels are widely used in residential, commercial, and multifamily construction projects. But even the best materials fail if they’re not installed correctly — and this is where nail patterns and sheet staggering play a critical role.
2. The Importance of Proper Nail Patterns
When installing Advantech subfloor panels, the nail pattern — meaning where and how often nails or screws are placed — directly affects:
- Structural integrity of the floor system
- Load distribution across joists
- Squeak prevention
- Long-term durability
Incorrect nailing can lead to panel movement, floor deflection, and irritating squeaks. To avoid this, following manufacturer recommendations and local building codes is essential.
3. Recommended Nail Patterns for Advantech Floor Sheathing
According to Huber’s installation guidelines, the standard nail or screw pattern for Advantech subfloor panels is as follows:
3.1. Fastener Spacing
- Edges (perimeter of the panel): 6 inches on center
- Intermediate supports (across joists): 12 inches on center
- Field nailing (inside the panel): Not typically required unless specified by the engineer
This means if your joists are spaced 16 inches apart, each panel will have nails or screws every 6 inches along the edges where panels meet and every 12 inches along the joists inside the panel.

3.2. Nail Size and Type
The recommended fasteners for Advantech are:
- Nails: 8d ring-shank nails (2 ½ inches)
- Screws: No. 8 or No. 10 wood screws, 2 ½ inches
- Coated fasteners: Galvanized or coated nails are recommended for moisture resistance
Ring-shank nails are preferred because they grip tighter and reduce the chance of floor squeaks.
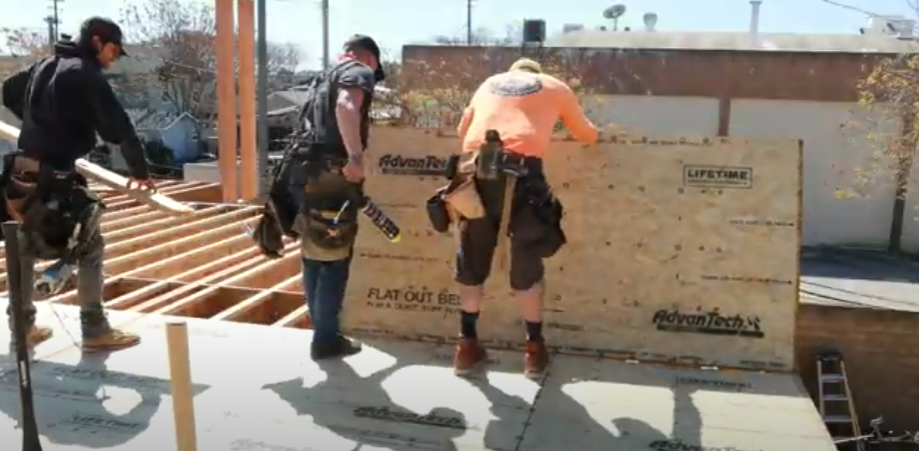
3.3. Adhesive and Nails Together
For best performance, it’s highly recommended to use subfloor adhesive in combination with nails or screws:
- Apply a continuous bead of APA-approved construction adhesive on top of the joists.
- Place the panel down and fasten immediately before the adhesive skins over.
- This combination significantly reduces squeaks and strengthens the entire floor system.
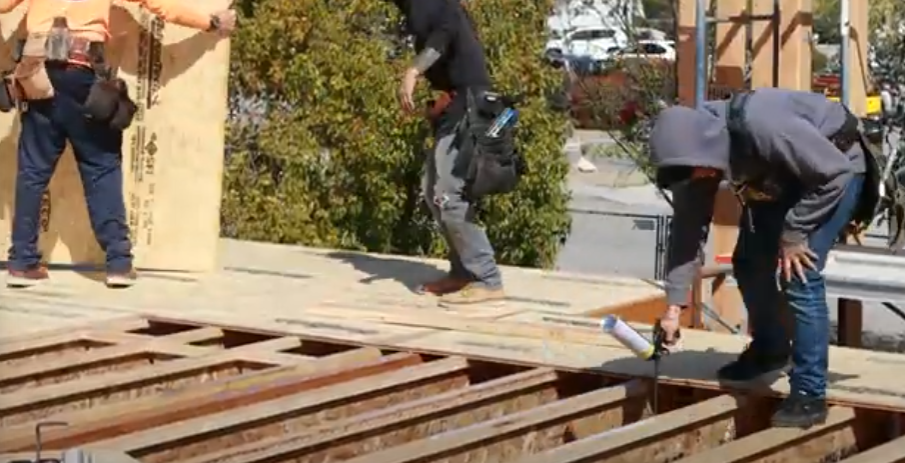
4. The Role of Staggering Sheets
Nailing patterns are only half the equation; sheet staggering is equally important. Staggering means offsetting the seams of the floor panels so that they don’t all line up in one straight line across multiple rows.
4.1. Why Staggering is Essential
Staggering your Advantech floor sheathing panels provides several benefits:
- Increases structural strength by spreading out panel seams
- Reduces weak points in the flooring system
- Prevents movement along seam lines
- Minimizes floor squeaks and deflection
- Meets code requirements for proper subfloor installation
If all the seams line up, it creates a “hinge line” that weakens the overall structure and can lead to long-term issues.
4.2. Staggering Guidelines
- Always offset panel end joints by at least one joist bay (typically 16 inches or 24 inches depending on joist spacing).
- For example, if the first row starts with a full 4′ × 8′ sheet, the second row should start with a half sheet (4′ × 4′) or a panel cut to land on the joist between the previous seams.
- Continue alternating full and half sheets to maintain a staggered pattern throughout the floor.
5. Installation Best Practices
To ensure you’re getting the most out of your Advantech subfloor system, here are some best practices:
5.1. Panel Layout
- Place the tongue-and-groove (T&G) edge facing out so it locks into the next panel.
- Ensure panels are installed with the long dimension perpendicular to the joists for maximum strength.
- Leave a 1/8-inch gap at panel ends to allow for expansion and contraction.
5.2. Start at a Straight Reference Line
- Begin panel installation from the longest, straightest wall.
- Use a chalk line to keep the first row perfectly straight, which helps maintain consistent staggering throughout the floor.
5.3. Handling Panel Expansion
- Advantech panels resist moisture, but you should still allow a small expansion gap between sheets.
- Use panel spacers or a carpenter’s nail shank to maintain the correct gap.
5.4. Checking for Proper Fastener Depth
- Drive nails or screws flush with the panel surface — not overdriven and not protruding.
- Overdriving fasteners can weaken holding strength, while underdriving creates uneven flooring.
6. Common Mistakes to Avoid
Even experienced builders make mistakes during installation. Here are the top issues to avoid when working with Advantech panels:
- Skipping adhesive — leads to squeaks and reduced stiffness.
- Incorrect nail spacing — too wide can cause loose panels; too close can split edges.
- Not staggering sheets — results in structural weakness and seam cracking.
- Overdriving nails — weakens fastener holding power.
- Ignoring expansion gaps — can cause buckling in humid environments.
7. Code Compliance and Manufacturer Guidelines
Advantech panels are manufactured to meet APA and IBC standards, but local building codes may have specific requirements regarding:
- Fastener size
- Spacing patterns
- Adhesive usage
- Sheathing thickness
Always confirm installation requirements with your local inspector or structural engineer before beginning a project.
8. Advantages of Following Proper Nail Patterns & Staggering
When you follow proper nailing and staggering guidelines for Advantech floor sheathing, you get significant benefits:
- Squeak-free flooring
- Greater structural strength
- Even weight distribution
- Long-term durability
- Better performance under load
Cutting corners during installation can compromise the entire flooring system, so investing time in doing it right pays off in the long run.
9. Final Thoughts
Advantech floor sheathing is engineered to deliver superior strength, moisture resistance, and long-term performance. But the material alone isn’t enough — how you install it matters just as much as the product you choose.
By following the correct nail patterns and properly staggering sheets, you’ll create a solid, durable subfloor system that resists squeaks, supports heavy loads, and lasts for decades.