Of course you know about creating a continuous load path with either connectors or rod tiedown systems, but have you considered using fasteners instead? In this post, Bryan Wert follows up on our May 2 webinar, Drive a New Path: Resisting Uplift with Structural Fasteners, by answering some of the interesting questions raised by the attendees.
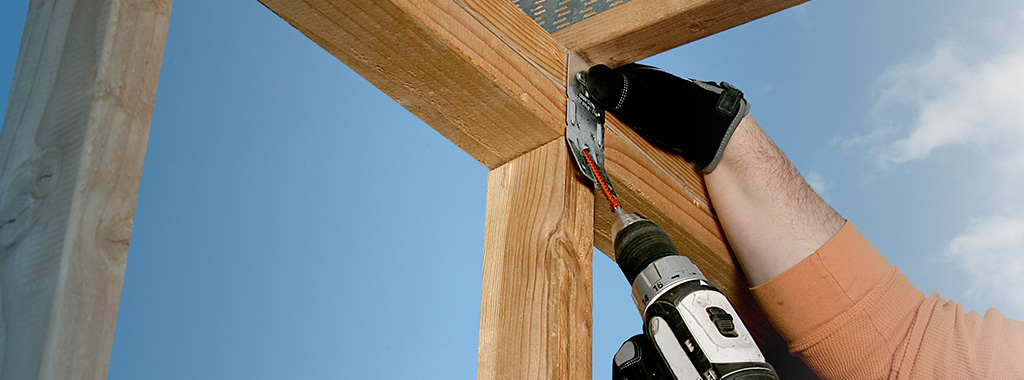
On May 2, Simpson Strong-Tie hosted an interactive webinar where we discussed different methods of creating a continuous load path for wind uplift resistance. Most of the hour-long webinar was devoted to the innovative structural screw system comprising our Strong-Drive® SDWC Truss screw and the SDWF Floor-to-Floor screw with TUW take-up washer. In addition to sharing load capacities, installation details and various benefits of this system, we included a design example with illustrative specification options. In case you weren’t able to join our discussion, you can watch the on-demand webinar and earn PDH and CEU
As with our previous webinars, we ended with a Q&A session for the attendees. Billy Viars, our Training Manager in the Southeast United States, and Kent Phillips, our Multi-Family Manager, participated in the conversation as well — and since both of these guys love the sound of their own voices, we couldn’t answer every question in the time allotted. Following are a few of the questions and their answers, but if you’d like to see the full list of questions and answers
Screw Features/Installation/Applications
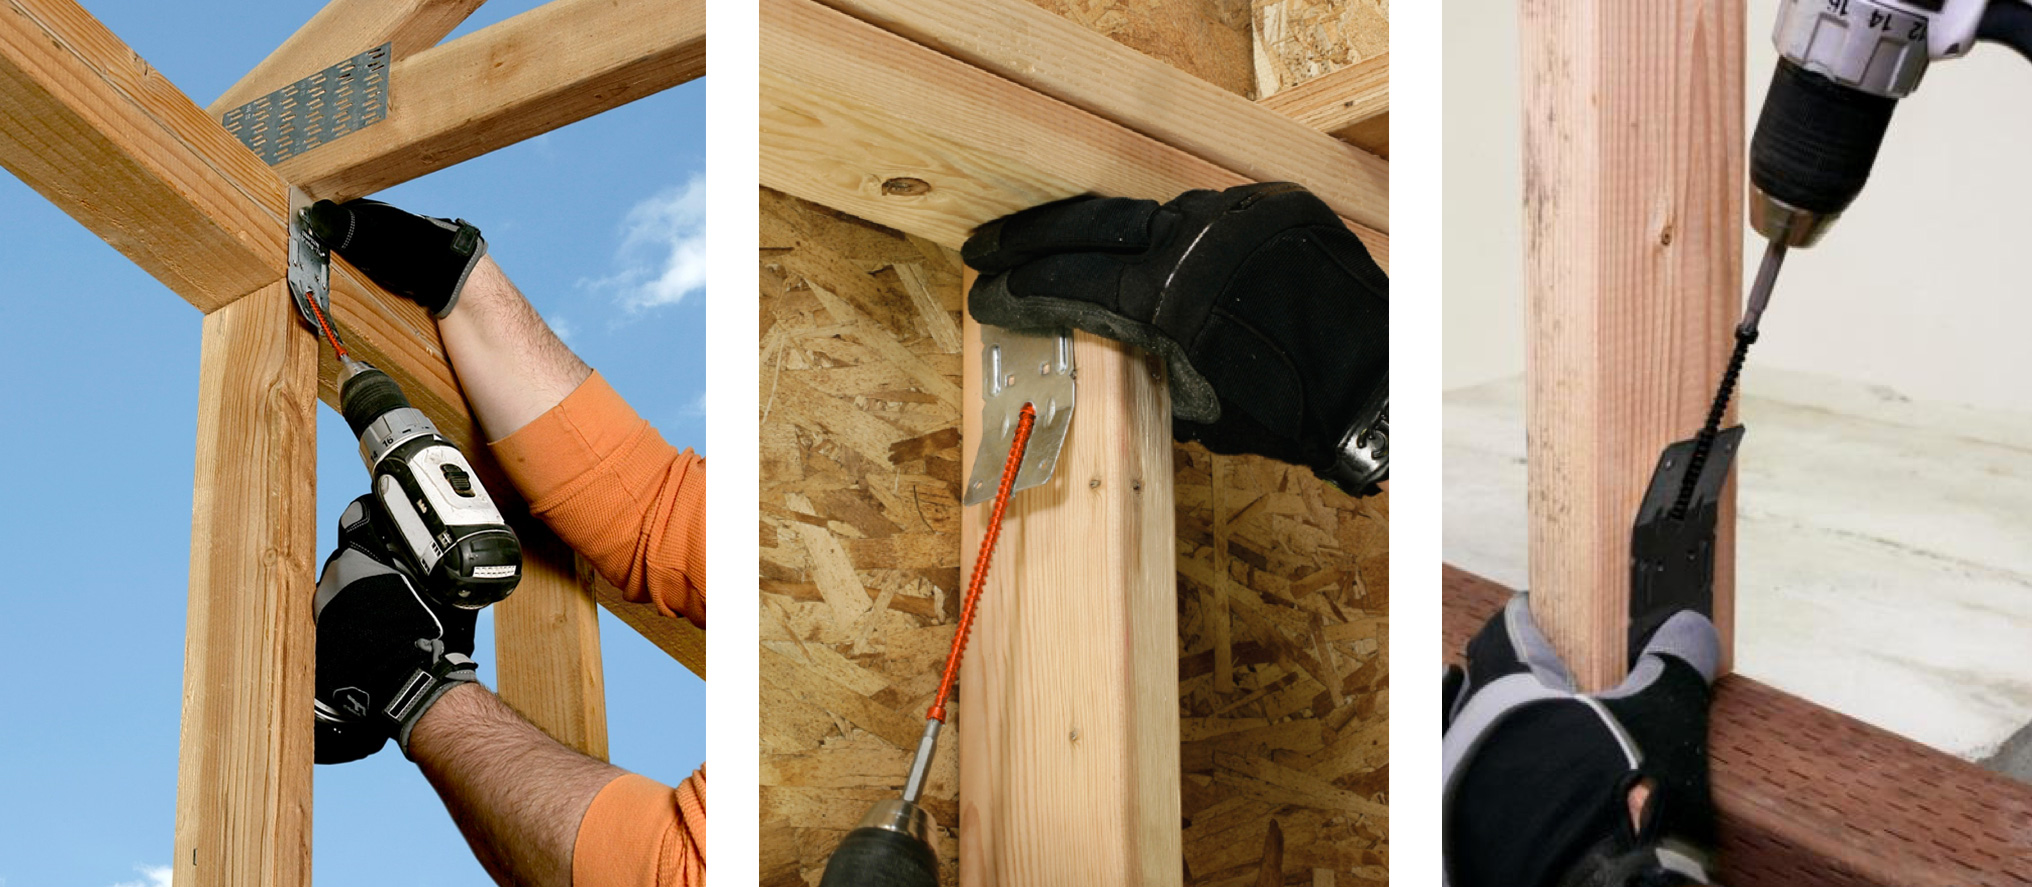
Does every SDWC screw require a guide?
The SDWC15600 and SDWC15450 both come with one guide in a box of 50 screws or two guides in a bucket of 500 screws. The guide helps ensure the correct angle of installation. Many times, however, the screw can be installed at no particular angle (e.g., roof member to top plate with no stud aligned below) — or, if an angled installation is required, our details allow for a range of acceptable angles for installation in case the guide is not used.
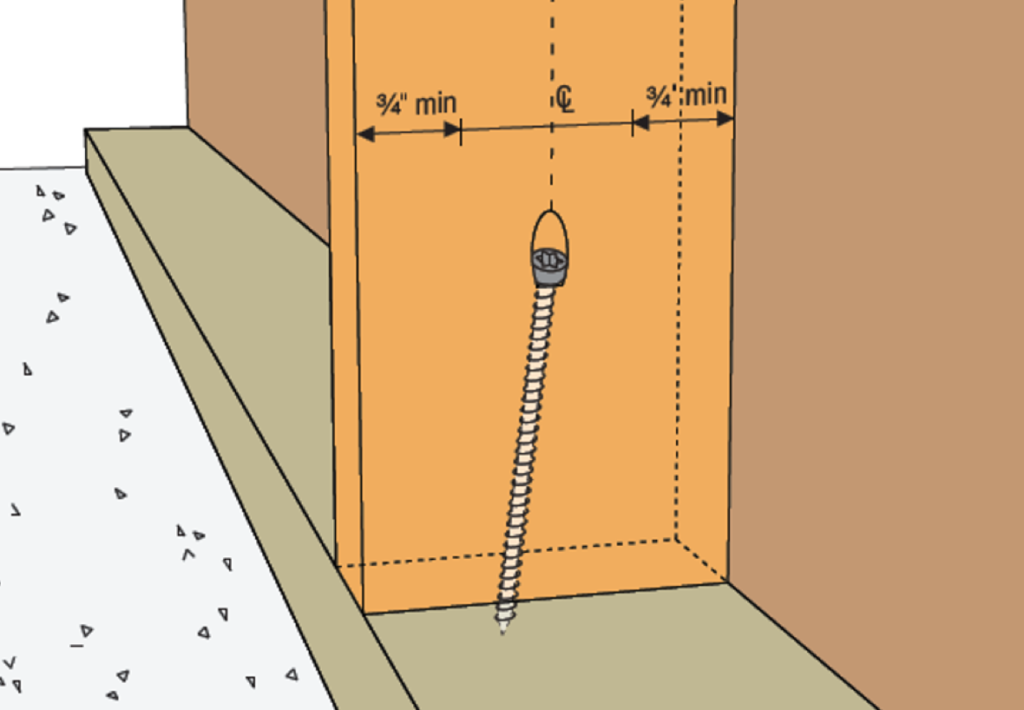
How much variation in screw placement and installation angle will inspectors accept?
The installation instructions show the acceptable angle range and important end- and edge-distance requirements. You can download them here.
Can you use impact drivers with these screws?
Yes, this one of advantages for using these fasteners.
Is it all right to use three fasteners per face in 2×4 and 2×6 studs?
We have installation instructions for SDWC screws through the wide face of a stud to plates using one, two or three screws per stud. These studs can be 2×4, 2×6 or 2×8. The maximum number of screws in the wide face of a stud that we’ve tested is two. For three screws, we require two in one face and one in the opposing wide face. The single screw should be between the two screws of the wide face.
What is the E-coat on the 4 ½ ” screws? Are these also zinc coated?
The E-coat® on the SDWC15450 is a proprietary coating that consists of a phosphate base and an organic top coating. The coating is recognized for use in some chemically treated woods. The SDWC15600 is zinc coated with an orange topcoat and is limited to dry-service conditions.
Is it ever advisable or necessary to have a second person to guide the screws through the top plate of the wall below?
It should never be necessary. One of the main advantages of the Truss screw is that installing it can be a one-person job. The only difficulty we’ve encountered is that, when installing the screw through a truss with a very steep angle, the installer needs to take some care to ensure that the tip of the screw gets started correctly and does not slide down the web.