Roof rafters are the backbone of any sloped roof structure, providing the necessary support for sheathing, underlayment, and roofing materials. Building roof rafters is a fundamental skill in carpentry and roofing, requiring precision, an understanding of load-bearing principles, and knowledge of geometry. Whether constructing a simple gable roof or a more complex hip roof, mastering rafter installation ensures structural integrity and long-term durability.
This guide covers the essential steps in building roof rafters, including material selection, layout, cutting, and installation. By following these principles, carpenters and DIY enthusiasts can confidently tackle roof framing projects.

1. Understanding Roof Rafters
What Are Roof Rafters?
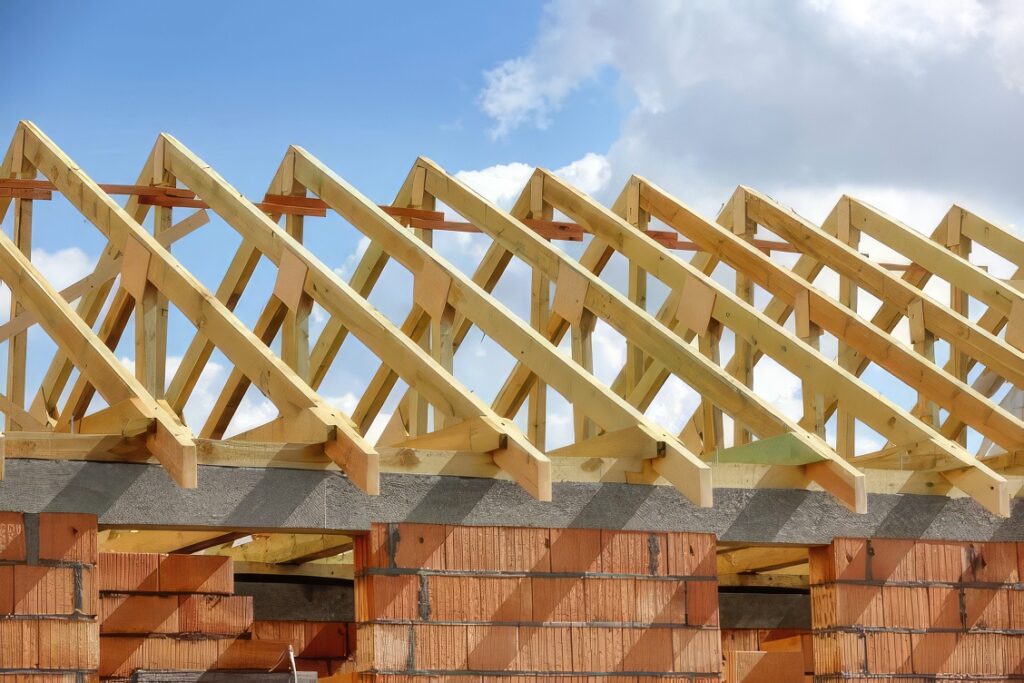
Roof rafters are inclined wooden or metal beams that extend from the ridge board (the highest point of the roof) down to the top plate of the exterior walls. They form the primary framework of a pitched roof, transferring the weight of the roof to the walls and foundation.
Types of Roof Rafters
- Common Rafters: The standard rafters in a gable roof, running perpendicular from the ridge to the wall plate.
- Hip Rafters: Used in hip roofs, these run diagonally from the ridge to the corners.
- Valley Rafters: Found where two roof sections intersect, forming a valley.
- Jack Rafters: Shorter rafters that connect hip or valley rafters to the wall plate.
Rafter vs. Truss Systems
While traditional stick-framing uses individual rafters, modern construction often employs prefabricated roof trusses. Trusses are engineered for efficiency but limit attic space and customization. Hand-cut rafters, however, allow for greater flexibility in roof design.

2. Materials and Tools Needed
Materials
- Lumber: Typically 2×6, 2×8, or 2×10 dimensional lumber, depending on roof span and load requirements.
- Ridge Board: A horizontal beam at the roof’s peak where rafters meet.
- Wall Plates: The top horizontal framing members of exterior walls.
- Metal Connectors: Hurricane ties, rafter ties, and joist hangers for added stability.
Essential Tools
- Framing Square: For marking rafter angles (plumb and seat cuts).
- Circular Saw or Handsaw: For cutting rafters.
- Speed Square: A handy tool for quick angle measurements.
- Chalk Line: For marking straight lines.
- Tape Measure & Pencil: For precise measurements and markings.
- Hammer & Nails (or Nail Gun): For securing rafters.
- Level: To ensure proper alignment.

3. Calculating Rafter Dimensions
Before cutting, accurate calculations are crucial. The key measurements include:
Roof Pitch
The roof pitch (slope) is expressed as a ratio (e.g., 4:12, meaning 4 inches of rise per 12 inches of run). This determines the angle of the rafters.
Span & Run
- Span: The total horizontal distance covered by the roof.
- Run: Half the span (for a symmetrical gable roof).
Rafter Length Calculation
Using the Pythagorean theorem:Rafter Length=(Run)2+(Rise)2Rafter Length=(Run)2+(Rise)2
For example, in a 4:12 pitch roof with a 12-foot span (6-foot run):Rise=6 ft×412=2 ftRise=6 ft×124=2 ftRafter Length=(6)2+(2)2=36+4=40≈6.32 ftRafter Length=(6)2+(2)2=36+4=40≈6.32 ft
Adjusting for Overhang
If the rafter extends beyond the wall (eaves), add the overhang length to the rafter.
4. Laying Out and Cutting Rafters
Step 1: Mark the Plumb Cut (Top Cut)
- Place the framing square on the rafter board with the rise (e.g., 4 inches) on the tongue and the run (12 inches) on the blade.
- Draw a line along the tongue for the plumb cut (where the rafter meets the ridge).
Step 2: Mark the Seat Cut (Birdsmouth)
- The birdsmouth is a notch where the rafter sits on the wall plate.
- Measure down from the plumb cut to mark the seat cut depth (typically 1/3 of the rafter’s width).
- Use the square to draw a level line for the seat cut and a vertical line to complete the notch.
Step 3: Mark the Tail Cut (Overhang)
- Extend the rafter length to include the overhang.
- Use the square to mark another plumb cut at the end (for fascia alignment).
Step 4: Make the Cuts
- Use a circular saw to cut along the marked lines.
- Test-fit the first rafter against the ridge and wall plate before duplicating.
5. Installing Roof Rafters
Step 1: Set the Ridge Board
- Temporarily brace the ridge board at the correct height (using scaffolding or temporary supports).
Step 2: Install Common Rafters
- Position the first pair of rafters at each gable end, ensuring they align with the ridge.
- Nail them into place using framing nails or metal connectors.
Step 3: Add Intermediate Rafters
- Space rafters 16 or 24 inches apart (on-center), following local building codes.
- Check for level and plumb as you go.
Step 4: Reinforce the Structure
- Install collar ties (horizontal beams between rafters) for added stability.
- Use hurricane clips or rafter ties to secure rafters to wall plates.
6. Common Mistakes and How to Avoid Them
Incorrect Measurements
- Always double-check calculations before cutting.
- Use a rafter template to ensure consistency.
Poorly Fitted Birdsmouths
- A too-deep birdsmouth weakens the rafter; keep it within code limits.
Improper Spacing
- Uneven spacing leads to uneven roof loads—use a spacing jig for accuracy.
Ignoring Local Building Codes
- Always follow regional codes for rafter sizing, spacing, and fastening requirements.
Conclusion
Building roof rafters is a foundational carpentry skill that combines geometry, precision cutting, and structural knowledge. By understanding rafter types, performing accurate calculations, and following proper installation techniques, carpenters can ensure a sturdy and long-lasting roof frame.
Whether working on a small shed or a full-house roof, mastering rafter construction empowers builders to create custom, durable structures. With practice and attention to detail, anyone can develop the expertise needed to frame a roof with confidence.


