Roofing trusses are the backbone of many modern structures, providing the essential framework that supports the roof and distributes weight evenly across a building. Unlike traditional rafters, which are cut and assembled on-site, trusses are prefabricated in factories, designed to precise engineering specifications. This makes them faster to install, more cost-effective, and often stronger than traditional framing methods.
But installing trusses isn’t just about setting them in place. A skilled framing roofing trusses builder follows a step-by-step process to ensure safety, efficiency, and structural integrity. Every stage—from preparation to final inspection—plays a vital role in creating a stable roof system that will last for decades.
Below is an in-depth look at the systematic approach professionals take when installing roofing trusses.
Step 1: Careful Planning and Site Preparation
Before the first truss is ever lifted, a successful installation starts with thorough planning. A framing roofing trusses builder begins by reviewing blueprints, engineering drawings, and truss manufacturer specifications. This ensures that the trusses ordered for the project match the roof’s design, pitch, and load requirements.
Key tasks during this stage include:
- Confirming dimensions: Builders verify that wall-to-wall measurements match the truss plans.
- Checking code compliance: Ensuring the truss system meets local building codes and engineering standards for snow, wind, and live loads.
- Preparing the site: The building’s top plates must be level, straight, and securely fastened. Any discrepancies at this stage can throw off the entire truss installation.
By the time trusses arrive on-site, the builder has already accounted for placement, bracing requirements, and the order in which the trusses will be installed.
Step 2: Proper Delivery, Handling, and Storage
Trusses are engineered structures, but they are also delicate if mishandled. When they arrive at the site, a framing roofing trusses builder ensures they are unloaded and stored correctly.
- Flat, supported storage: Trusses should be stacked on a flat surface and supported every few feet to prevent sagging.
- Protection from damage: Builders avoid dragging trusses, which can cause splintering or bending of chords.
- Weather considerations: If rain or moisture is expected, trusses may be covered with breathable tarps to prevent warping.
Improper storage can lead to damaged trusses, which compromises safety and delays installation.
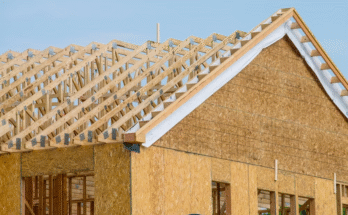
Step 3: Lifting and Positioning the Trusses
Once the building’s walls are ready, the builder moves to the most visible part of the process: lifting the trusses into place.
- Manual lifting for smaller trusses: Residential trusses for smaller homes can often be carried and raised by hand.
- Cranes for larger trusses: In commercial projects or large custom homes, trusses may span 40 feet or more, requiring a crane for safe positioning.
Trusses are lifted in a pre-determined order, often starting with the gable end truss (the vertical frame that forms the roof’s edge). This first truss acts as an anchor for the rest of the system.
Step 4: Temporary Bracing for Stability
Safety is paramount during installation, and temporary bracing ensures the structure doesn’t collapse during the build.
A framing roofing trusses builder will:
- Secure the first truss vertically with diagonal braces attached to the ground or wall.
- Add the second truss and connect it with temporary spacers.
- Continue setting trusses and bracing them as they go.
These braces hold the trusses in alignment and prevent them from tipping under wind or accidental force. Skipping or rushing this step can lead to dangerous job site accidents.
Step 5: Setting All Trusses in Place
With bracing in place, the builder sets the rest of the trusses according to the layout plan. Spacing is typically 24 inches on center for residential roofs but may vary depending on engineering requirements.
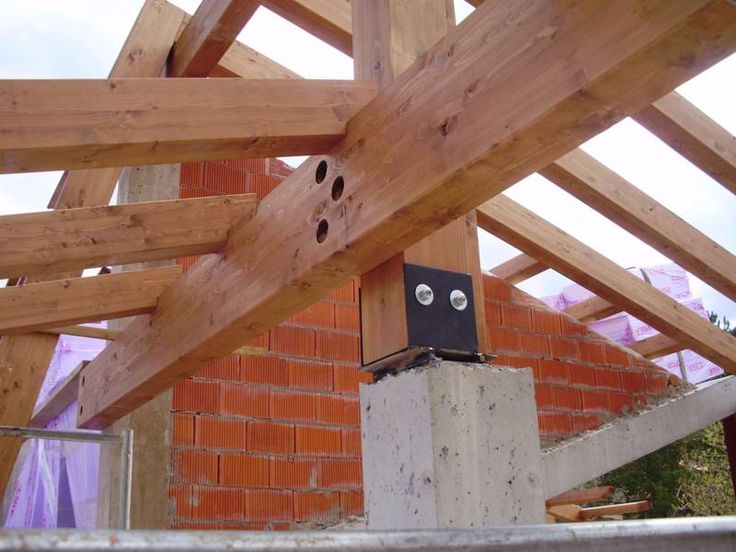
Each truss is:
- Placed exactly where specified on the wall plates.
- Nailed or fastened securely using metal connector plates, hurricane ties, or straps (especially important in areas with high winds).
- Checked for alignment to ensure a straight, even roof line.
Builders often use string lines or laser levels to keep trusses perfectly aligned during this process.
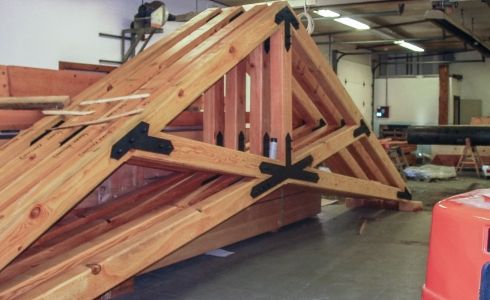
Step 6: Permanent Bracing Installation
Once all trusses are set, permanent bracing is added. These braces strengthen the roof system and ensure long-term stability.
There are several types of permanent bracing:
- Lateral bracing: Runs horizontally along the trusses, tying them together.
- Diagonal bracing: Creates triangles for rigidity, helping resist lateral forces like wind.
- Web bracing: Installed on the inside of the truss to support the web members.
This step is essential to maintain the structural integrity of the roof and ensure the truss system performs as engineered.
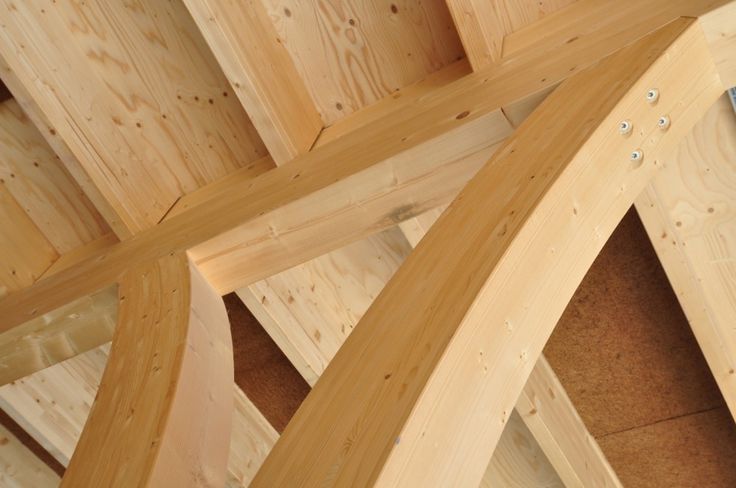
Step 7: Sheathing the Roof
After the trusses are fully secured and braced, the builder begins installing the roof sheathing—usually plywood or oriented strand board (OSB).
- Starting at the lower edge: Sheathing is laid from the eaves upward, staggered for strength.
- Nailed to trusses: Each sheet is nailed at specific intervals (commonly every 6 inches along edges and every 12 inches in the field).
Sheathing creates a solid surface for the underlayment and roofing materials (shingles, metal, or tile) and locks the trusses together even further.
Step 8: Final Inspection and Adjustments
Before the roofing crew moves in, a framing roofing trusses builder performs a final inspection.
This involves:
- Ensuring all trusses are secured correctly and bracing is complete.
- Verifying that no trusses are damaged, split, or improperly connected.
- Checking that everything meets building code and manufacturer guidelines.
In many jurisdictions, a building inspector will also review the work at this stage. Only after approval can roofing materials like felt, shingles, or tiles be applied.
Step 9: Safety Throughout the Process
Every step of truss installation is performed with safety in mind. Builders follow strict guidelines, including:
- Wearing fall protection gear when working at heights.
- Using proper ladders and scaffolding to reduce the risk of falls.
- Securing tools and materials so they don’t become hazards.
- Following manufacturer recommendations for lifting and handling.
A skilled framing roofing trusses builder knows that rushing or skipping steps can lead to structural failures or serious injuries.
Challenges a Builder May Face
Even with a step-by-step plan, truss installation isn’t always straightforward. Builders often deal with:
- Weather delays: Rain, snow, or high winds can halt installation for safety reasons.
- Damaged trusses: If a truss is damaged during delivery or handling, it must be repaired according to manufacturer specs or replaced entirely.
- Complex designs: Custom homes with multiple rooflines may require a combination of truss types, demanding precision in placement.
Experienced builders adapt quickly, solving problems on-site without compromising the roof’s integrity.
Why This Process Matters
Every step described above isn’t just “best practice”—it’s necessary for the safety and performance of the building. Roofing trusses bear enormous loads, from heavy snow in winter to powerful gusts of wind. If trusses are installed incorrectly or bracing is skipped, the results can be catastrophic: sagging roofs, cracked walls, or even structural collapse.
By following a step-by-step process, a framing roofing trusses builder ensures:
- Structural stability for decades to come.
- Compliance with codes and engineering specs.
- Faster, safer, and more efficient construction.
Conclusion
Installing roofing trusses is one of the most critical tasks in framing construction. A framing roofing trusses builder doesn’t just throw trusses into place—they follow a meticulous step-by-step process that prioritizes precision and safety from start to finish.
From planning and site preparation to final inspection, every stage builds on the last to create a roof structure that is strong, secure, and ready to withstand the test of time. For homeowners and developers, hiring a skilled builder who respects this process is the best way to ensure their project is built to last.